
Thinking about giving your kitchen a fresh new look without the hassle of replacing your cabinets? Thermofoil cabinets can be a tricky surface to paint, but it’s definitely not impossible!
If you’ve been wondering how to achieve a smooth, durable finish on your thermofoil cabinets, you’ve come to the right place. We’re going to walk you through the simple steps to transform your kitchen. Get ready to love your cabinets again!
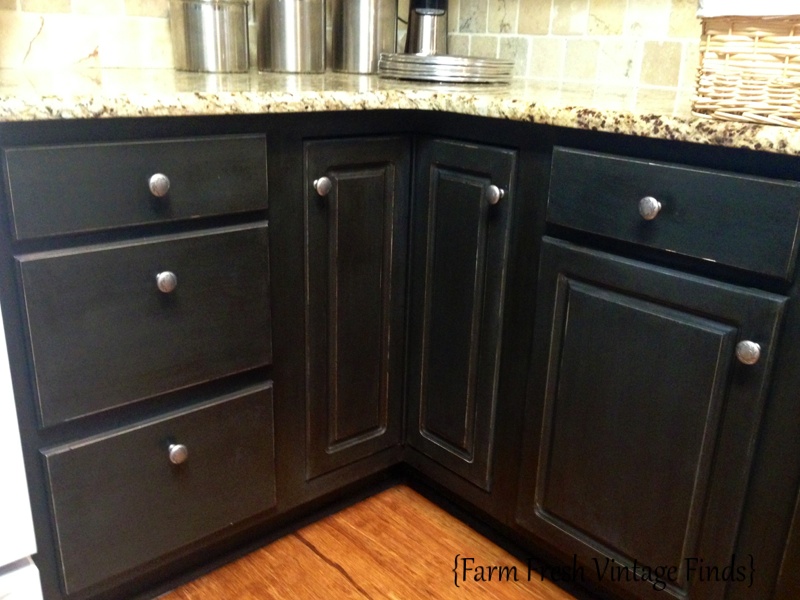
Credit: farmfreshvintagefinds.com
Thermofoil Cabinets: What Are They?
Thinking about updating your kitchen? You might have thermofoil cabinets. What exactly are they? Let’s break it down.
What Is Thermofoil?
Thermofoil is a type of vinyl. It’s a thin plastic film. Manufacturers apply it to furniture. They often use it on cabinets. This creates a smooth finish. It looks like painted wood. It’s a popular choice for kitchens.
How Are Thermofoil Cabinets Made?
MDF forms the cabinet base. MDF is medium-density fiberboard. It’s a wood product. Manufacturers press the vinyl onto the MDF. They use heat and pressure. This bonds the vinyl securely. It creates a seamless surface. No seams are visible. This gives a clean look.
Why Choose Thermofoil?
Thermofoil cabinets are affordable. They are budget-friendly. They offer a modern appearance. They are also easy to clean. A damp cloth works well. This makes them practical. Many people like their style. They can refresh a kitchen easily.
Why Repaint Thermofoil?
Thermofoil cabinets offer a sleek look. They can, however, lose their charm. Repainting them brings new life. It’s a smart renovation choice. You can update your kitchen’s style. It’s also budget-friendly.
The Appeal Of A Fresh Look
Cabinets show wear over time. Colors can seem dated. Thermofoil can peel. Cracks may appear. A new paint color transforms spaces. It makes kitchens feel modern. You get a custom finish. It’s like a new kitchen. But for much less money.
Boosting Your Home’s Value
Updated kitchens sell homes. Fresh paint is a big plus. It shows good upkeep. Buyers love new kitchens. Thermofoil cabinets look great painted. This upgrade is noticeable. It increases your home’s appeal. A higher selling price is possible.
Cost-effective Cabinet Refresh
New cabinets cost a lot. Replacing thermofoil is expensive. Painting is a smart alternative. It requires less investment. You can do it yourself. Or hire a painter. The savings are substantial. You get a big impact. For a small price tag.
Personalizing Your Space
Your style is unique. Standard cabinet colors are limiting. Painting lets you choose. Pick any color you desire. Match your decor perfectly. Create a kitchen you love. Reflect your personal taste. Make your home feel yours.
Gathering Your Supplies
First, gather what you need. Get a good degreaser and fine-grit sandpaper. You’ll also want a quality primer and paint.
You need the right tools. Gathering supplies is the first step. It makes the job easier. You will have a smoother process.
Cleaning Essentials
Start with cleaning supplies. You need a good degreaser. A clean surface is crucial. Remove all grease and grime. Mild dish soap works well. Use a soft cloth. You can also use a sponge. Rinse thoroughly. Let cabinets dry completely.
Sanding Tools
Sanding prepares the surface. You need fine-grit sandpaper. Aim for 180-grit or 220-grit. This scuffs the thermofoil. It helps paint stick. You can use a sanding block. This gives an even finish. Sand all cabinet surfaces. Wipe away dust. A tack cloth is useful.
Priming And Painting
Primer is very important. It helps paint adhere. Use a high-quality bonding primer. This is made for slick surfaces. Choose a spray primer. It offers a smooth coat. Next, select your paint. An oil-based enamel is best. It is durable and washable. You can also use latex paint. Ensure it is high-quality.
Application Tools
You need good brushes. Use a high-quality synthetic brush. This prevents brush marks. A foam roller works well. It provides a smooth finish. For spray painting, you need a sprayer. This gives the best result. Protect your work area. Use painter’s tape. Cover floors and countertops. Use drop cloths.
Preparation Is Key
Good preparation makes cabinet painting easy. Clean cabinets thoroughly first. Proper prep ensures a smooth, lasting finish.
Repainting thermofoil cabinets needs careful work. Proper prep makes your new paint last. It ensures a smooth, professional finish. Do not skip these steps. They are very important.
Removing Hardware
First, remove all hardware. Take off door handles. Remove drawer pulls. This gives you a clean surface. It prevents paint drips. It makes painting easier.
Cleaning Thoroughly
Clean cabinets very well. Use a degreaser. Wipe away all grease. Remove dirt and grime. A clean surface helps paint stick. It prevents peeling later.
Sanding For Adhesion
Lightly sand the cabinets. Use fine-grit sandpaper. This creates a rough surface. Paint grips this texture better. It helps paint adhere well. Wipe away all dust.
Priming For Success
Priming is key. It sets the stage. Good primer makes paint stick. It prevents peeling later. This step is vital for success. Do not skip it.
Choosing The Right Primer
Select a good primer. Use one for slick surfaces. Look for adhesion primers. They bond well to thermofoil. A stain-blocking primer helps too. It covers old colors. It prevents bleed-through. Kilz and Zinsser make good options. Check product labels carefully. Ensure it works on plastic. This is very important.
Application Techniques
Prepare the cabinet surface. Clean it thoroughly first. Use a degreaser. Rinse it well. Let it dry completely. Apply the primer evenly. Use a high-quality brush. A foam roller works well. Avoid thick coats. Thin coats dry faster. They give a smoother finish. Two thin coats are best. Allow drying time between coats. Follow product instructions. Lightly sand between coats. This improves adhesion. Dust off all sanding residue.
Painting Your Cabinets
Repainting thermofoil cabinets can refresh your kitchen. It is a rewarding DIY project. Proper preparation is key. This section guides you through painting. You can achieve beautiful results. Let’s get started.
Selecting Your Paint
Choose the right paint. Consider a high-quality enamel paint. It offers durability. Look for paints designed for cabinets. Satin or semi-gloss finishes work well. They resist moisture. They are easy to clean. Select a primer too. A good primer helps paint stick. It covers imperfections. Test paint colors first. See how they look in your light.
Application Methods
You have a few options. Spraying offers a smooth look. It requires a spray gun. It needs good ventilation. Rolling is another method. Use a high-density foam roller. This minimizes brush marks. Brushing works for details. Use a good quality brush. Apply thin, even coats. Multiple thin coats are better. They provide a uniform finish.
Achieving A Smooth Finish
Smoothness takes effort. Sand lightly between coats. Use fine-grit sandpaper. Wipe away dust completely. This creates a slick surface. Avoid drips and runs. Work in good lighting. Take your time painting. Patience brings the best results. A smooth finish looks professional. Enjoy your updated cabinets.
Drying And Curing
Drying and curing are vital steps. They ensure your new paint job lasts. Proper drying prevents peeling. Curing makes the paint hard. This section explains how to do it right.
Allow Adequate Drying Time
Let the paint dry completely. This is not the same as dry to touch. Paint needs time to set. Follow the paint manufacturer’s advice. This is usually 24 hours. Do not rush this step. Patience pays off here.
Understand The Curing Process
Curing is a longer process. Paint hardens over time. This makes it durable. Full cure can take weeks. Be gentle with cabinets during this time. Avoid heavy cleaning. Avoid placing heavy items on doors.
Optimize Drying Conditions
Good airflow helps drying. Open windows or use fans. Maintain a moderate room temperature. Avoid high humidity. Humidity slows down paint drying. This is important for a good finish. A dry environment is best.
Reassembling Your Cabinets
Ready to give your kitchen a fresh look? Learn how to repaint thermofoil cabinets. This guide helps you get your cabinets looking new again.
The final step in your thermofoil cabinet makeover is putting everything back together. This stage brings your hard work to life. Patience is key here. Take your time. A well-reassembled cabinet looks fantastic.
Prepare For Reassembly
Ensure all painted parts are completely dry. Check for any dust or debris. A soft cloth works well. Make sure you have all your hardware. Screws and hinges. Lay them out neatly. This prevents lost pieces.
Attach New Hardware
Now, attach your new cabinet knobs. Or handles. Screw them into the pre-drilled holes. Use the correct screws. Do not overtighten. This can damage the new finish. Make sure they are straight. A level helps.
Rehang Cabinet Doors
Carefully place the cabinet doors back on their hinges. Align the hinge plates. Screw them securely. Adjust the hinges for proper door alignment. Doors should close smoothly. They should sit flush. This might take a few tries.
Reinsert Cabinet Drawers
Slide the drawers back into their glides. Ensure they move freely. If a drawer sticks, check the glides. They might need minor adjustment. Push them in gently. They should glide in and out easily.
Admire Your Work
Step back and look. Your cabinets are transformed. You completed a great project. Enjoy your refreshed kitchen.
Troubleshooting Common Issues
Painting thermofoil cabinets can be tricky. You might run into problems. Don’t worry. We cover common issues here. Learn how to fix them. Get beautiful cabinets.
Peeling Or Chipping
Thermofoil can peel. This happens over time. Moisture is a cause. Heat is another factor. You see paint flaking off. It looks bad. You need to fix it. Scrape loose paint away. Use a putty knife. Smooth the edges. Sand the area lightly. Clean it well. Apply a good primer. Then repaint the cabinet. Use multiple thin coats.
Uneven Finish
An uneven finish is common. You might see streaks. Or brush marks show. This happens with poor prep. Or bad paint application. Ensure the surface is smooth. Sand between paint coats. Use a foam roller. It gives a smoother look. Apply paint evenly. Don’t overload the roller. Work in one direction. Let each coat dry. This prevents unevenness.
Adhesion Problems
Paint not sticking? This is adhesion failure. Thermofoil is slick. It resists paint. You need proper preparation. Clean the cabinets thoroughly. Use a degreaser. Sand the surface well. This creates grip. Use a bonding primer. This is very important. It helps paint stick. Apply thin coats of paint. Let them dry completely. Test paint in a small spot. This checks adhesion.
Maintaining Your Painted Cabinets
Give your thermofoil cabinets a fresh look. Proper prep is key for a lasting finish. Clean them well before painting. This ensures your new paint adheres perfectly.
Painting thermofoil cabinets is a great upgrade. Proper care keeps them looking fresh. You want your new look to last. This section guides you. Learn how to protect your paint.
Gentle Cleaning Practices
Wipe cabinets often. Use a soft, damp cloth. Avoid harsh scrub brushes. They can scratch the paint. Mild soap works well. Rinse with clean water. Dry them thoroughly. This prevents water spots.
Avoiding Damaging Substances
Keep certain cleaners away. Abrasive cleaners are bad. Solvents can damage paint. Strong chemicals are a no. Even some cooking sprays cause issues. They leave a sticky residue. This is hard to remove.
Protecting Against Scratches
Be mindful of sharp objects. Knives can easily scratch. Avoid dragging pots and pans. Use cabinet liners if needed. They add an extra layer. Protect corners and edges. These areas get the most wear.
Frequently Asked Questions
Can I Paint Thermofoil Cabinets?
Yes, you can paint thermofoil cabinets. Proper preparation is key for good results. This means cleaning and sanding are very important steps.
What Is The Best Paint For Thermofoil?
Use a high-quality bonding primer first. Then, a durable enamel paint works well. Choose paints designed for cabinets or furniture.
How Do I Prepare Thermofoil For Paint?
Clean the cabinets thoroughly. Lightly sand the surface. This helps the primer stick better. Wipe away all dust after sanding.
Do I Need To Prime Thermofoil Cabinets?
Yes, priming is essential. A good bonding primer creates a solid base. It helps the new paint adhere properly. Without primer, paint can peel.
How Long Does Painting Thermofoil Take?
Painting takes time and patience. Plan for several days. This includes drying time between coats. Rushing the process leads to poor results.
Will Painted Thermofoil Chip Or Peel?
It can chip or peel if not prepped well. Using the right primer and paint helps. Careful application also prevents issues. Gentle use extends the paint’s life.
What Tools Are Needed To Paint Thermofoil?
You will need cleaning supplies. Sandpaper or a sanding sponge is necessary. Brushes and rollers are also required. Painter’s tape protects surrounding areas.
Conclusion
Painting thermofoil cabinets is achievable. You can refresh your kitchen’s look. Follow the prep steps carefully. Proper cleaning is key. Sanding helps paint stick. Use the right primer. Then, apply your chosen paint. Multiple thin coats work best. Allow drying time between coats.
Your cabinets will look new. Enjoy your updated space. It’s a rewarding project. You can do it.