
Thinking about lowering your ceiling? Maybe you have a drafty, cavernous room that feels a bit too grand, or perhaps you’re looking to improve insulation and reduce energy bills.
Whatever your reason, lowering a ceiling is a project that can transform your space and your comfort. It might sound daunting, but with the right approach, it’s a manageable DIY endeavor or a straightforward task for a contractor. Ready to create a cozier, more efficient room?
Let’s dive into how you can achieve that perfect ceiling height.
Why Lower A Ceiling?
Lowering a ceiling offers many benefits. It can transform a room’s feel. A dropped ceiling fixes many issues. It also adds new possibilities. Think about the reasons. You might be surprised.
Hiding Imperfections
Older homes have problems. Ceilings show their age. You see cracks. Water stains mar the surface. Old wiring can be messy. Dropping the ceiling hides these flaws. It creates a fresh, clean look. No more eyesores. Just smooth, new surfaces.
Improving Insulation
Heat escapes through the ceiling. This wastes energy. It makes rooms cold. Dropped ceilings create space. You can add more insulation. This keeps heat in. It also keeps cool air in. Your energy bills will drop. Rooms feel more comfortable. A win-win situation.
Enhancing Lighting
Recessed lighting is popular. It looks sleek and modern. You need a lower ceiling for this. Dropped ceilings provide the depth. They allow for hidden fixtures. This creates a soft, even glow. Eliminate harsh overhead lights. Improve your room’s ambiance.
Creating Zones
Open spaces can feel vast. They lack definition. Lowering a ceiling can define areas. You can create distinct zones. A lower section over a dining table. A different level above a seating area. This adds visual interest. It makes rooms more functional.
Planning Your Lowered Ceiling
Lowering a ceiling can improve a room’s feel. It hides pipes and wires. This project offers a fresh look.
Planning your lowered ceiling is crucial. Careful planning prevents costly mistakes. It ensures a smooth, successful project. Think about every detail. This section guides your planning.
Measuring And Layout
Measure your room precisely. Note the existing ceiling height. Decide your new ceiling height. Mark the new height on walls. Use a level for accuracy. Plan the grid layout. Consider room dimensions. Sketch your layout plan.
Choosing Materials
Select your ceiling material. Drywall is a popular choice. Wood panels offer a warm look. Acoustic tiles reduce noise. Think about the room’s use. Consider your budget carefully. Look at material durability. Choose materials that fit your style.
Ventilation Needs
Assess your current ventilation. Does the room need more air? Lowering a ceiling can affect airflow. Plan for new vents. Consider exhaust fan placement. Ensure proper air circulation. Good ventilation prevents moisture. It keeps the room healthy.
Electrical Considerations
Locate existing wiring. Map out new light fixtures. Plan for recessed lighting. Consider switch locations. Ensure safe electrical work. Hire a qualified electrician. Check local building codes. Proper electrical planning is vital.
Gathering Tools And Supplies
Gathering the right tools is your first step. You will need safety gear, measuring tools, and cutting implements. Ensure all supplies are ready before you begin.
Starting a ceiling lowering project requires careful preparation. You need the right tools. You also need the correct materials. Gathering everything first makes the job easier. It prevents frustrating trips to the store. This ensures a smoother workflow.
Essential Tools
You’ll need a tape measure. A pencil marks your cuts. A level ensures straight lines. A utility knife cuts drywall. Safety glasses protect your eyes. Work gloves prevent splinters. A sturdy stepladder is crucial. A cordless drill drives screws. A hammer is also useful.
Framing Materials
New lumber forms the new frame. You will likely use 2x4s. These create the lowered structure. Measure carefully for your cuts. Ensure all pieces are straight. You need enough wood for support. This holds the new ceiling securely.
Drywall And Fasteners
Drywall panels cover the frame. Standard drywall is common. You might need ceiling-specific types. Screws fasten drywall panels. Use drywall screws for best results. Ensure you have enough screws. They hold the panels tightly.
Finishing Supplies
Joint compound, or mud, fills seams. Drywall tape covers the seams. Sandpaper smooths the dried mud. Primer prepares for paint. Paint finishes the new ceiling. These items create a seamless look.
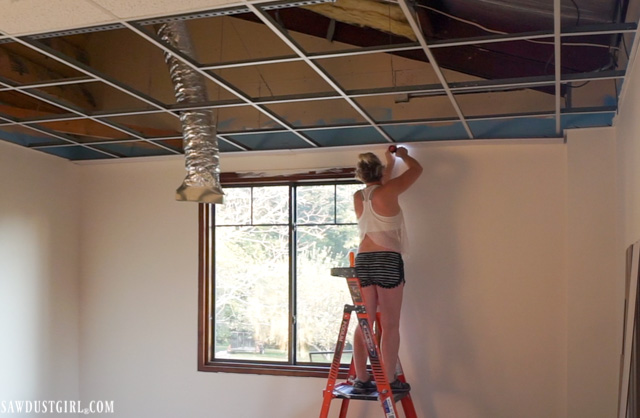
Credit: sawdustgirl.com
Framing The New Ceiling
Framing the new ceiling is the next crucial step. This creates the structure for your lowered ceiling. It supports the new drywall. Proper framing ensures a level and stable finish. It’s the skeleton of your new look. Let’s build this foundation.
Attaching Furring Strips
First, find ceiling joists. You can use a stud finder. Mark their locations clearly. Attach furring strips to these joists. Use sturdy screws. These strips provide a surface. They add height for insulation. They also create a level plane.
Building A New Frame
Now, construct the new frame. Use wood or metal. This frame hangs from the existing ceiling. It defines the new ceiling’s height. Measure carefully. Cut pieces to size. Assemble the frame on the ground. This is easier and safer. Make sure it’s square.
Securing The Frame
Lift the assembled frame. Position it against the furring strips. Secure the frame to the furring strips. Use strong screws or bolts. Ensure it is level. Check for plumb. This frame is now the base. It holds your new ceiling securely.
Installing Drywall
Lowering a ceiling involves installing new drywall. This new layer covers the old ceiling. It creates a smoother, finished look.
Drywall installation is a key step. It creates your new, lower ceiling surface. This part requires care. Precision matters. Follow these steps for a smooth finish.
Cutting Drywall Panels
Measure your ceiling area carefully. Mark the drywall sheets. Use a sharp utility knife. Score the paper deeply. Snap the board along the line. Cut the paper on the back side. This makes clean edges. Handle panels with a helper. Large sheets are heavy.
Hanging The Drywall
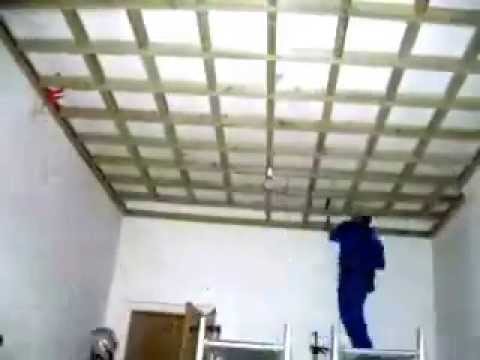
Start in a corner. Place the first panel. Ensure it fits snugly. Leave a small gap at the edges. This gap helps with finishing. Work across the ceiling. Stagger the drywall seams. This creates a stronger surface. Avoid aligning seams. This pattern looks better.
Securing Drywall Sheets
Use drywall screws. Drive them into the joists. The screws should be flush. Do not overtighten them. This can tear the paper. Space screws about 16 inches apart. Use a drywall screw gun. It makes the job faster. Ensure all sheets are secure. They should not move.
Credit: www.youtube.com
Taping And Mudding
Taping and mudding create a smooth surface. This step covers drywall seams. It makes the ceiling look seamless. Proper technique is key. This ensures a professional finish.
Applying Joint Tape
Drywall tape bridges the gaps. It goes over every seam. You can use paper or mesh tape. Apply it firmly. Press out any air bubbles. This tape prevents cracks.
First Coat Of Mud
Joint compound is the mud. Spread a thin layer. Cover the joint tape completely. Feather the edges outward. This makes the mud blend. Let this coat dry fully.
Subsequent Coats
Apply more thin coats. Each coat should be wider. This further hides the tape. Allow drying time between coats. Two or three coats are common. The goal is a flat surface.
Sanding For Smoothness
Sand the dried mud gently. Use fine-grit sandpaper. This removes bumps and ridges. Dust is a byproduct. Wipe the ceiling clean. The surface should feel smooth.
Finishing Touches
The finishing touches transform your lowered ceiling. They make the project look complete. Good finishing makes a big difference. It elevates the entire room.
Priming The Surface
Preparation is key here. Always prime your new ceiling. Primer seals the surface. It ensures even paint coverage. Use a quality primer. Apply it evenly. Let it dry completely. This step prevents problems. It makes painting easier.
Painting The Ceiling
Choose your paint color. White is a popular choice. It makes the room feel bigger. Use a good quality paint. Apply it with a roller. Use an extension pole. Get full coverage. Apply a second coat. Let it dry thoroughly. A fresh coat looks amazing.
Installing Lights And Vents
Now for the functional parts. Install your new light fixtures. Make sure they are secure. Add your ventilation covers. Ensure they fit snugly. Test all your lights. Check the ventilation airflow. These elements complete the look. They add practicality too. Enjoy your updated space.

Credit: www.wikihow.com
Common Pitfalls To Avoid
Lowering a ceiling can transform a room. It makes spaces feel cozier. It can hide unsightly pipes. But mistakes happen. Avoiding common pitfalls is key. These errors can cost time and money. They can even create safety hazards. Learn from others’ experiences. Preventing these issues makes the project smoother.
Inadequate Ventilation
Poor ventilation is a big problem. New ceilings can trap moisture. This leads to mold growth. Mold is bad for health. It damages building materials. Proper airflow is essential. Install vents in the new ceiling. Ensure good air circulation. Consider exhaust fans in kitchens. Bathrooms need them too.
Electrical Mishaps
Electricity is dangerous. Working with wires needs care. Always turn off power. Use a voltage tester. Confirm circuits are dead. Incorrect wiring causes fires. It can shock people. Hire an electrician if unsure. They know safety rules. Don’t guess with electricity.
Uneven Surfaces
A bumpy ceiling looks bad. It detracts from the room. Achieving a smooth finish takes skill. Measure carefully. Use a level often. Check for straightness. The frame must be true. Drywall installation needs precision. Sanding can fix small flaws. Large dips are harder to hide.
Ignoring Building Codes
Building codes protect everyone. They ensure safety standards. Local codes vary widely. Check regulations before starting. Permits may be required. Inspectors will check your work. Violating codes can be costly. You might have to redo work. Follow all safety rules. Consult your local building department.
Frequently Asked Questions
Why Lower A Ceiling?
Lowering a ceiling can hide unsightly beams. It helps improve room insulation. You can also add recessed lighting easily.
What Are The Methods To Lower A Ceiling?
You can use drywall or drop ceilings. Framing is often needed for support. Plywood can also be used.
How Much Does It Cost To Lower A Ceiling?
Costs vary greatly by method. DIY can save money. Professional installation costs more. Expect a few hundred to a few thousand dollars.
Can I Lower A Ceiling Myself?
Yes, with some skills. Basic carpentry is helpful. Drywall installation takes practice. Ensure you have the right tools.
What Is The Easiest Way To Lower A Ceiling?
A drop ceiling is often simplest. It uses a grid system. Panels just snap into place. It’s forgiving for beginners.
How Much Height Is Lost Lowering A Ceiling?
This depends on the method. Drywall typically loses 3-6 inches. Drop ceilings can lose more. Plan for the space needed.
When Should I Avoid Lowering A Ceiling?
If the room is already small. If you need maximum headroom. If there are complex ducts to hide. Consider the overall feel.
Conclusion
Lowering a ceiling takes effort. It can transform your space. Plan carefully for best results. Measure twice, cut once. Gather all your materials. Follow safety guidelines always. You can achieve a cozier feel. Enjoy your updated room.