
Thinking about tiling your shower floor? It’s a project that can totally transform your bathroom’s look and feel.
But let’s be honest, a tile shower floor can seem a little intimidating. You might be wondering, “Is this something I can actually do? ” The good news is, yes, you can! With the right guidance, you can create a beautiful, durable, and water-resistant shower floor that you’ll be proud of.
This guide breaks down exactly how to get it done, step-by-step, so you can ditch the doubt and get ready for a stunning new shower.
Planning Your Tile Shower Floor
Choosing the right tile is key. Consider slip resistance. Proper planning ensures a beautiful, lasting shower floor.
A well-planned tile shower floor lasts for years. Proper planning prevents costly mistakes. It ensures a beautiful, functional shower space. This section guides your planning process.
Choosing The Right Tile
Select durable, water-resistant tiles. Porcelain and ceramic are good choices. Small tiles offer better grip. They also create a unique look. Avoid very smooth or polished tiles. They can become slippery when wet. Consider the grout color too. Darker grout hides stains better.
Essential Tools And Materials
Gather your supplies before starting. You will need tiles. Buy a few extra tiles. You will need thin-set mortar. Grout is also necessary. A trowel helps spread mortar. A level ensures a flat surface. Tile nippers cut tiles. A sponge cleans excess grout. Safety glasses protect your eyes. Gloves keep hands clean.
Layout And Design Considerations
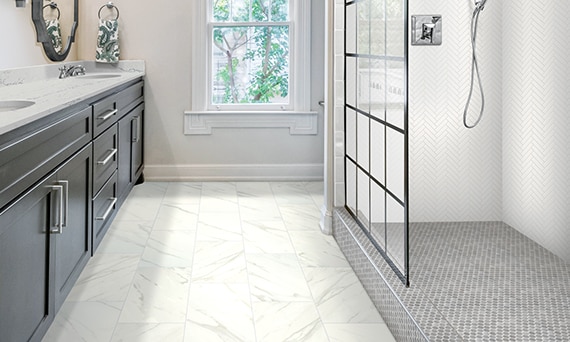
Visualize your tile pattern. A simple grid works well. Diagonal patterns can look dynamic. Plan your tile cuts carefully. Minimize awkward cuts. Start in a visible area. Ensure even spacing between tiles. Use tile spacers for consistency. This creates a professional finish.
Credit: www.daltile.com
Preparing The Shower Subfloor
A solid shower floor starts with a strong subfloor. Ensure it’s clean, dry, and level. This preparation prevents future tile problems.
A solid foundation is crucial. This step ensures your tile job lasts. Proper subfloor preparation prevents future problems. It is the bedrock of a beautiful shower.
Old Flooring Removal
First, remove old flooring. This can be tile, vinyl, or linoleum. Use a pry bar and scraper. Work carefully. Avoid damaging the subfloor underneath. Get rid of all old adhesive too. A clean surface is essential.
Subfloor Inspection And Repair
Inspect the subfloor closely. Look for any damage. Check for soft spots or rot. Water damage is common. Repair any damaged areas. Use new plywood or cement board. Ensure the subfloor is level. A flat surface is vital. This prevents tile lippage. It makes tiling much easier.
Installing A Waterproof Membrane
Next, install a waterproof membrane. This protects your subfloor. It stops water from reaching wood. Options include liquid-applied or sheet membranes. Follow the manufacturer’s instructions. Overlap seams properly. Seal all edges and corners. This creates a watertight barrier. Your shower floor will be safe.
Setting The Tile
Lay your tiles carefully. Ensure even spacing for a clean look. Press each tile firmly into the thin-set mortar.
This is where the real magic happens. Setting the tile transforms a plain floor into a beautiful shower. It requires patience and precision. Get this step right. Your shower floor will look amazing.
Applying Thin-set Mortar
Spread thin-set mortar on the floor. Use a notched trowel. Hold the trowel at an angle. This creates ridges. The ridges help the tile stick. Do not cover too much area at once. The mortar can dry out. Work in small sections.
Laying The First Row
Start in a corner. This is usually the back corner. Place the first tile firmly. Press it into the mortar. Use a level to check. Ensure the tile is flat. Keep the grout lines even. Use tile spacers. Spacers keep lines uniform.
Cutting And Fitting Tiles
Some tiles need cuts. Measure carefully. Mark the tile. Use a wet saw or tile nippers. Make the cut smoothly. Fit the cut tile into place. Press it gently. Ensure it is level. Fill any gaps with mortar.
Working Around Drains And Obstacles
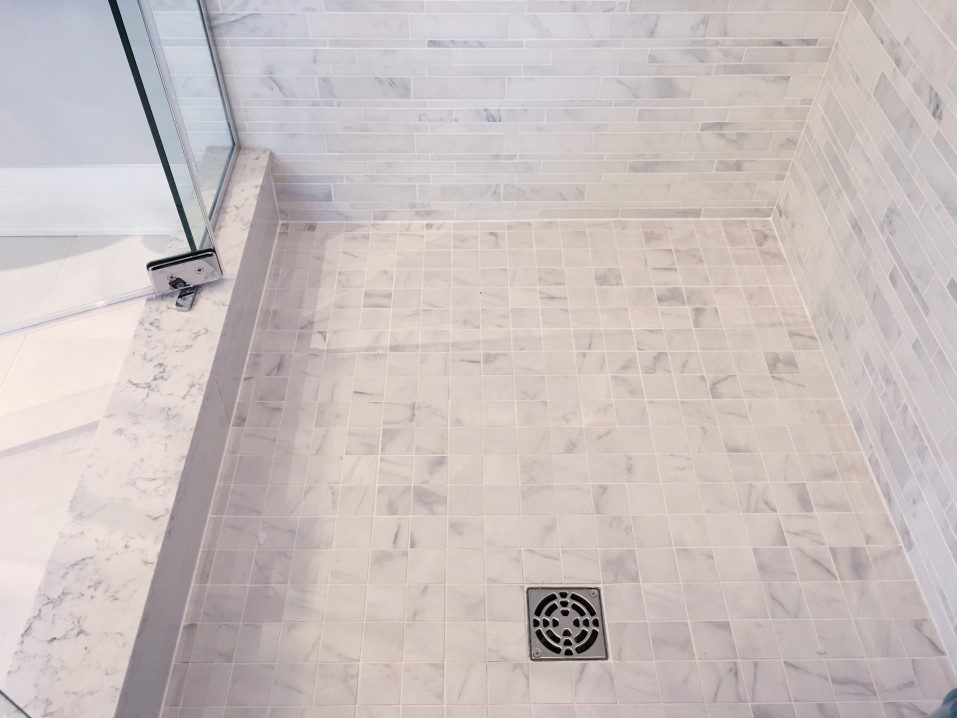
Showers have drains. They have other obstacles too. Cut tiles to fit around them. Make precise cuts. Ensure a snug fit. Seal around the drain well. This prevents leaks. Take your time here. Careful cuts look best.
Credit: selectkitchenandbath.com
Grouting The Shower Floor
Grouting fills the gaps between tiles. This step seals your shower floor. It also gives your tiled shower a finished look.
Grouting is a critical step. It seals your tile. It also adds a finished look. Proper grouting prevents water damage. It keeps your shower floor looking great.
Mixing And Applying Grout
Get your grout ready. Follow the manufacturer’s instructions. Mix it to a peanut butter consistency. It should be smooth. Not too wet. Not too dry. Use a grout float. Spread the grout over tiles. Work it into the joints. Ensure every gap is full.
Cleaning Excess Grout
Wipe away extra grout. Use a damp grout sponge. Rinse the sponge often. Wipe diagonally across tiles. This avoids pulling grout out. Make several passes. Get the tiles clean. Leave grout in the joints.
Grout Curing Time
Let the grout cure. This takes time. Check the grout bag. It needs 24 to 72 hours. Do not walk on it. Do not get it wet. Proper curing is vital. It makes grout strong. Your shower floor is ready.
Sealing And Finishing
Proper sealing protects your tiled shower floor. Apply a quality sealer evenly. This step prevents water damage and stains.
This is the final step. Proper sealing protects your new tile floor. It keeps out water and stains. A well-finished floor looks great. It lasts much longer too.
Applying Grout Sealer
Choose a good grout sealer. It should be for wet areas. Apply it carefully to the grout lines. Use a small brush or applicator. Work in small sections. Wipe away any excess sealer. Let it soak in for a few minutes. Wipe off all remaining sealer. Do not let it dry on the tile. Check your sealer’s instructions. It will tell you how long to wait. This step is very important. It prevents future problems.
Final Cleaning And Inspection
Clean the entire floor again. Use a damp cloth. Remove any dust or debris. Inspect all grout lines. Make sure they are fully covered. Look for any missed spots. Check the tile surface too. Ensure it is clean and dry. You want a perfect finish. This is your last chance to fix things. A clean floor looks professional.
Allowing For Full Curing
Your tile floor needs time. It must dry completely. This is called curing. Follow the sealer’s instructions. Most sealers need 24 to 72 hours. Avoid walking on the floor. Do not expose it to water. Wait until it is fully cured. Then you can use your shower. A fully cured floor is strong. It resists damage. Patience here pays off. Enjoy your beautiful new floor.
Maintenance Tips
Tiling a shower floor needs care. Proper waterproofing is key. Seal grout lines regularly. This prevents water damage and keeps your floor looking great.
Keeping your tiled shower floor looking its best is simple. Regular care prevents grime buildup. This section shares easy maintenance tips. You will keep your shower floor beautiful.
Daily Cleaning Routine
Wipe down the floor daily. Use a soft cloth or squeegee. This removes soap scum. It also prevents water spots. A quick rinse helps. Dry the area completely. This stops mold growth.
Deep Cleaning Strategies
Clean your shower floor weekly. Use a mild tile cleaner. Apply it with a soft brush. Scrub gently in circles. Rinse the floor thoroughly. Dry it well afterward. For grout, use a grout cleaner. Apply it carefully. Brush it into the grout lines. Wipe away excess cleaner.
Addressing Common Issues
Tackle mildew promptly. Mix baking soda and water. Make a paste. Apply it to the mildew. Let it sit for an hour. Scrub it away. Rinse the area well. For hard water stains, use vinegar. Spray it on the stains. Let it soak briefly. Wipe the stains clean. Rinse and dry the floor.
Credit: www.hydroblok.com
Frequently Asked Questions
What Tiles Are Best For Shower Floors?
Choose tiles with good grip. Porcelain or natural stone are popular. Look for options rated for slip resistance.
How Do I Prepare The Shower Floor For Tile?
The subfloor must be strong and level. Install a waterproof membrane. This prevents water damage.
What Kind Of Grout Works For Shower Floors?
Use epoxy grout or cementitious grout with a sealer. These resist moisture and stains well. They hold up to bathroom conditions.
Should I Slope The Shower Floor For Drainage?
Yes, a slight slope is crucial. It directs water towards the drain. Aim for a quarter-inch slope per foot.
How Do I Cut Tiles For A Shower Floor?
Measure carefully and mark your cuts. Use a wet saw or tile nippers. Practice on scrap pieces first.
How Long Does Tile Take To Dry On A Shower Floor?
Allow at least 24 hours for grout. Tile adhesive also needs time to cure. Check the product instructions for specifics.
Can I Tile Over An Existing Shower Floor?
Sometimes, but check the condition. The old floor must be solid. You may need to remove it for best results.
Conclusion
Tiling a shower floor is achievable. Take your time with each step. Proper preparation makes a big difference. Measure twice, cut once. Sealing is very important. Enjoy your beautiful new shower. You can do this.