If you own an RV, you know how important it is to keep every system in good shape. One often-overlooked part is the hot water heater. Over time, minerals like calcium and lime build up inside, which can reduce water flow, make your heater less efficient, and even cause early failure. Many RV owners turn to vinegar as a safe, effective, and affordable cleaner. But cleaning an RV hot water heater with vinegar is more than just pouring it in and waiting. Doing it right can extend the life of your water heater, give you better hot showers, and even save money on repairs.
This article will guide you through the full process of cleaning your RV hot water heater with vinegar. It will cover the tools you need, step-by-step instructions, tips for safety, and ways to avoid common mistakes. You will also find practical advice, real examples, and answers to questions most beginners miss.
Whether you use your RV only on weekends or live in it full-time, you’ll find everything here to keep your hot water running reliably.
Why Clean Your Rv Hot Water Heater?
Many RV owners do not realize how quickly sediment and mineral buildup can damage their hot water heater. Hard water, which is common across the US, leaves behind minerals that settle at the bottom of the tank. These minerals act as a barrier between the burner and water, forcing the heater to work harder. This can lead to:
- Higher propane or electricity use
- Less hot water
- Noisy operation (often a popping or rumbling sound)
- Shorter heater lifespan
Ignoring these issues can turn into costly repairs or even the need for a full replacement. Cleaning with vinegar removes these deposits, restoring performance and efficiency.
Non-obvious Insight: Even Newer Heaters Need Attention
Some people think only old heaters need cleaning. In fact, new RV water heaters can collect sediment within months, especially if you travel to areas with hard water. Waiting too long makes cleaning harder and may damage the tank lining.
Non-obvious Insight: Regular Cleaning Reduces Odor
If your hot water starts to smell like rotten eggs, it’s not just a minor annoyance—it’s often a sign of bacteria reacting with minerals inside the tank. Regular cleaning with vinegar can stop these odors before they start.
How Vinegar Cleans Your Water Heater
Vinegar is a mild acid that dissolves calcium, lime, and mineral deposits without harming metal or plastic parts. It’s also safe for the environment and much cheaper than commercial cleaners. Unlike bleach or strong acids, vinegar won’t leave dangerous residues or corrode the tank.
How It Works
When you soak mineral buildup in vinegar, the acid breaks down the hard materials and turns them into a soft sludge. This sludge can be easily rinsed out, leaving the tank clean and the heating element exposed for better heat transfer.
Why Not Use Other Chemicals?
Some cleaners contain strong acids that can eat away at seals, gaskets, and the tank lining. Others, like bleach, can create toxic fumes if mixed with other substances. Vinegar is safe, easy to find, and much less risky for both you and your RV.
Credit: telasko.cz
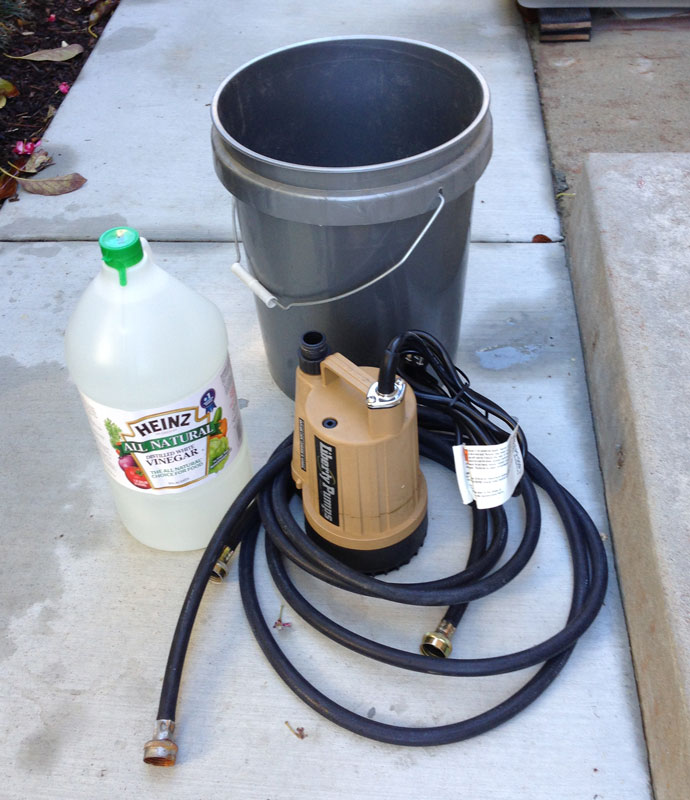
Tools And Materials You’ll Need
Before starting, gather all the necessary tools and supplies. Having everything ready will save time and make the process smoother.
- White distilled vinegar (typically 2-4 gallons, depending on tank size)
- Large bucket (at least 5 gallons)
- Water heater tank rinser (wand or nozzle that attaches to a garden hose)
- Adjustable wrench or socket set (to remove the anode rod or drain plug)
- Teflon tape (for resealing the threads)
- Garden hose (for rinsing)
- Funnel (to pour vinegar into the tank)
- Rubber gloves and protective eyewear
- Clean rags or towels (for spills)
- Freshwater supply (to refill the tank)
- Bucket or container (to catch draining water)
- Step stool (if your heater is mounted high)
- Flashlight (for visibility inside the compartment)
Optional But Helpful
- Water pressure regulator (to avoid hose bursts)
- Flexible hose extension (to direct draining water away from the RV)
- Small mirror (to inspect inside the tank opening)
Step-by-step: Cleaning Your Rv Hot Water Heater With Vinegar
This section will walk you through every part of the process, from preparation to final checks. Follow each step carefully for best results.
1. Turn Off And Cool Down The Water Heater
- Switch off the propane and electricity that power the heater. Most RVs have a control panel inside or near the water heater.
- Allow the heater to cool for at least 2 hours. Hot water and steam can cause serious burns.
2. Relieve Pressure And Drain The Tank
- Turn off the water supply to your RV.
- Open a hot water faucet inside the RV to release pressure from the system.
- Locate the water heater outside the RV. Remove the cover if needed.
- Place a bucket under the drain plug or anode rod.
- Use an adjustable wrench to carefully unscrew the drain plug or anode rod. Water will start draining out. Be prepared for a lot of water—usually 6 to 10 gallons.
- Let the tank drain fully.
Example Data: Typical Rv Water Heater Sizes
| RV Type | Heater Capacity (Gallons) | Typical Brand |
|---|---|---|
| Small Trailer | 6 | Suburban, Atwood |
| Class C Motorhome | 6-10 | Suburban, Dometic |
| Fifth Wheel | 10-12 | Atwood, Girard |
3. Inspect The Drain Plug And Anode Rod
- Check the anode rod (if your heater has one). It should be at least half its original thickness. If it’s heavily corroded, replace it now.
- Inspect the drain plug for cracks or wear.
Non-obvious Insight: Anode Rods Are Cheap Insurance
Many owners skip anode checks. Replacing a worn rod every year (costing $10–20) can prevent tank rust and leaks that cost hundreds to fix.
4. Rinse Out Loose Sediment
- Insert a tank rinser or hose nozzle into the drain opening.
- Spray water inside to knock loose any soft sludge or sediment at the bottom.
- Let water and debris flow out until it runs clear.
5. Add Vinegar To The Tank
- Close the drain plug or install a new anode rod, wrapping threads with Teflon tape to prevent leaks.
- Use a funnel at the pressure relief valve opening (or remove a fitting if your model allows).
- Pour 2-4 gallons of white vinegar into the tank. The exact amount depends on the tank size (see table below).
Vinegar Amount Guide
| Tank Size (Gallons) | Vinegar Needed (Gallons) |
|---|---|
| 6 | 2–2.5 |
| 10 | 3–3.5 |
| 12 | 4 |
- Fill the rest of the tank with fresh water until full.
6. Soak And Circulate
- Turn the water heater back on (either propane or electric).
- Let the vinegar solution heat up and sit inside the tank for at least 4–6 hours. For heavy buildup, let it soak overnight (8–12 hours).
- The heat helps the vinegar break down tough deposits.
Experience-based Tip: Run The Faucet
While soaking, run a little hot water through the RV faucets (collect it in a bucket for disposal). This circulates the vinegar mix through the pipes, helping clean them too.
7. Drain And Flush
- Turn off the heater and let it cool for 1 hour.
- Open a hot water faucet to relieve pressure.
- Remove the drain plug/anode rod and allow the tank to empty.
- Use the rinser wand again to flush out loosened debris. Repeat until water runs clear and has no vinegar smell.
Example: Signs Of A Clean Tank
- Water drains out quickly and looks clear.
- No gritty or sandy residue at the opening.
- No strong vinegar odor.
8. Reinstall Parts And Refill
- Inspect and clean the drain plug/anode rod.
- Wrap threads with fresh Teflon tape.
- Reinstall tightly but do not overtighten.
- Close the pressure relief valve.
- Turn the water supply back on and fill the tank.
- Check for leaks around fittings and the heater compartment.
9. Test And Final Checks
- Once the tank is full, turn the heater back on.
- Open hot water faucets to let air escape.
- Check for hot water flow and listen for quiet operation.
- If water still smells or is discolored, repeat the flushing step.
Non-obvious Insight: Save Vinegar For Next Time
If you collected the drained vinegar in a clean bucket, you can use it for a second cleaning of other appliances, like coffee makers or washing machines.
How Often Should You Clean Your Rv Hot Water Heater?
Frequency depends on water hardness and usage. As a rule of thumb:
- Full-time RVers: Every 3–6 months
- Seasonal users: At least once per year, ideally before and after storage
- After travel in hard water areas: Clean as soon as possible
Signs It’s Time To Clean
- Water takes longer to heat
- Strange odors from hot water
- Noises like popping or rumbling
- Reduced hot water flow
Data: Water Hardness In The Us
Some regions, like the Midwest and Southwest, have very hard water. You can check your local water quality using an online map or by asking at RV parks. Hard water means more frequent cleanings.
Common Mistakes And How To Avoid Them
Even experienced RV owners make errors when cleaning their hot water heaters. Here’s how to avoid the most frequent problems:
- Forgetting to Turn Off Power: Never open a hot water heater with power on. Electric elements burn out fast if dry.
- Not Letting the Tank Cool: Hot water can cause burns. Always cool completely before opening.
- Using Too Little Vinegar: Less than 2 gallons in a 6-gallon tank won’t clean thoroughly.
- Skipping the Anode Rod Check: A worn rod leaves your tank unprotected.
- Not Rinsing Enough: Remaining sludge can clog faucets or leave odors.
- Overtightening the Drain Plug: This can strip threads or crack the tank.
- Ignoring Leaks: Small drips can lead to big damage. Always check for leaks after reassembly.
- Not Flushing the Whole System: Sediment can remain in pipes if you only clean the tank.
- Mixing Chemicals: Never add bleach or other cleaners with vinegar, as this can create dangerous fumes.
- Storing the RV With a Dirty Tank: Always clean before long-term storage to prevent odors and corrosion.
What If You Find Problems During Cleaning?
Sometimes, cleaning reveals bigger issues. Here’s what to watch for:
- Heavily corroded anode rod: Replace it.
- Cracked tank or fittings: Do not use the heater. Seek professional help.
- Persistent leaks: May require new seals or gaskets.
- Strange noises after cleaning: More flushing may be needed, or the heating element could be loose.
If in doubt, contact a certified RV technician for advice.
Comparing Vinegar With Other Cleaning Methods
RV owners often wonder how vinegar stacks up against commercial descalers or other DIY solutions. Here’s a quick side-by-side look:
| Cleaner Type | Pros | Cons |
|---|---|---|
| Vinegar | Safe, cheap, eco-friendly, easy to find | May require soaking for heavy buildup |
| Commercial Descalers | Fast acting, powerful | Expensive, can damage parts if misused, chemical odors |
| Bleach | Kills bacteria | Does not remove minerals, can leave harsh fumes, not for metal tanks |
| Baking Soda | Safe for pipes | Not strong enough for heavy mineral deposits |

Credit: www.youtube.com
Safety Tips For Cleaning With Vinegar
Vinegar is safe, but the cleaning process involves water, electricity, and sometimes propane. Keep these safety tips in mind:
- Always turn off all power sources before starting.
- Let the heater cool fully before opening.
- Wear rubber gloves and eye protection to avoid splashes.
- Work in a well-ventilated area.
- Dispose of used vinegar and sludge away from plants, as acidity can harm them.
- If you smell propane, stop and check for leaks before relighting.
How To Extend The Life Of Your Rv Water Heater
Regular cleaning is the most important step, but these extra habits can help:
- Use a water filter at the hose inlet to reduce minerals entering your system.
- Flush the tank after every long trip or once a season.
- Replace the anode rod yearly, or sooner in hard water areas.
- Drain the tank completely before winter storage.
- Check for leaks and rust during every cleaning.
Experience-based Tip: Softening Your Rv Water
If you travel often, consider a small portable water softener for your RV. This reduces mineral buildup and means less frequent cleaning.

Credit: www.lippert.com
Troubleshooting: If Hot Water Still Isn’t Right
Sometimes, cleaning isn’t enough. Here are common problems and what to do:
- No hot water at all: Check circuit breakers, fuses, and propane valves.
- Water is too hot or cold: Adjust the thermostat setting on the heater.
- Water smells bad after cleaning: Flush again; odor may remain if all debris isn’t removed.
- Low hot water flow: Check for clogged screens at faucets or bypass valves not set correctly.
- Persistent noises: May need more flushing, or a technician if sounds continue.
Signs You Need Professional Help
It’s smart to know when to call a pro. Seek expert help if:
- The tank is leaking.
- You find rust flakes or black sludge.
- The heating element is visibly damaged.
- There’s a strong smell of gas or burning.
- You’re unsure about reassembly or electrical connections.
Professional RV service centers have specialized tools and can test for hidden issues.
Real-world Example: Full-time Rver Cleans Their Heater
Sarah, a full-time RVer, noticed her hot water was running cold and smelled musty. She followed the vinegar cleaning steps. After soaking overnight and flushing twice, her water heated up faster, and the smell disappeared. She found her anode rod was nearly gone, so she replaced it.
Now, she cleans every 4 months and hasn’t had a problem since.
Costs And Savings
Cleaning your RV hot water heater with vinegar costs very little:
- Vinegar: $5–$10 for 2–4 gallons
- Anode rod: $10–$20 (if needed)
- Rinser wand: $8–$15 (one-time purchase)
A professional cleaning costs $80–$150. If a heater fails, replacement can cost $500–$1,000. Regular DIY cleaning is a small investment that can save you hundreds.
Where To Find More Information
For detailed diagrams or model-specific instructions, check your RV’s owner’s manual or the manufacturer’s website. You can also learn about RV plumbing systems from sites like RV.com.
Frequently Asked Questions
How Much Vinegar Should I Use To Clean My Rv Hot Water Heater?
Use 2–4 gallons of white distilled vinegar for most RV water heaters. A 6-gallon tank needs about 2–2.5 gallons, while a 10–12 gallon tank may need up to 4 gallons. Always fill the rest of the tank with fresh water.
Can I Use Apple Cider Vinegar Instead Of White Vinegar?
It is not recommended. White vinegar is preferred because it is pure, clear, and leaves no sticky residue. Apple cider vinegar may add color, odor, and can leave sugars behind that cause more buildup.
How Often Should I Clean My Rv Hot Water Heater?
For full-time RVers, clean every 3–6 months. For seasonal users, once a year is usually enough. Clean more often if you notice odors, slow heating, or after travel in areas with hard water.
Will Vinegar Damage My Rv Water Heater Or Pipes?
No. Vinegar is safe for both metal and plastic tanks and pipes, as long as you rinse well afterward. It will not harm seals, gaskets, or the heating element when used as described.
What Should I Do If My Hot Water Still Smells After Cleaning?
Flush the tank again with fresh water until the smell disappears. If odor remains, check and replace the anode rod. Persistent smells could mean bacteria are present, which may require a shock treatment with hydrogen peroxide (never mix with vinegar).
Keeping your RV hot water heater clean with vinegar is simple, safe, and cost-effective. A few hours of maintenance can give you reliable hot water and peace of mind on all your journeys.